Kierpanda was foolish enough to give me control for a post…
So away with her easy-to-make, creative dishes – and in with this unnecessarily complicated, silly guest post!
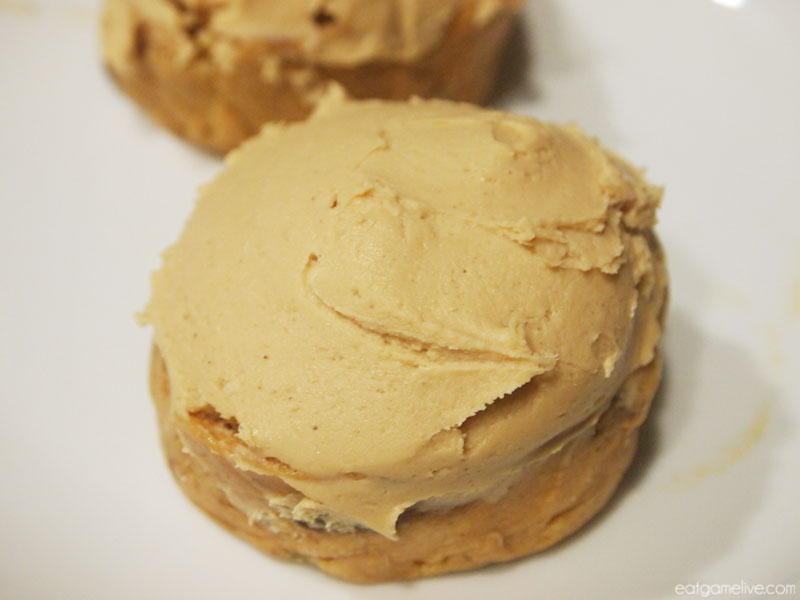
This recipe creates two smooth, beautiful mousses that you can pipe into martini glasses, or put into a mold for a cake, or just eat it straight out of a bowl. No, I promise I didn’t do that… much.
Onto the recipe!
The cake is essentially 4 parts:
- Cake layer – use any cake you like. Store bought is okay, cakemix is okay, or brownies would be great too!
Making an orange sponge cake 😀 - White honey mousse
- Chocolate mousse
- Fondant decoration
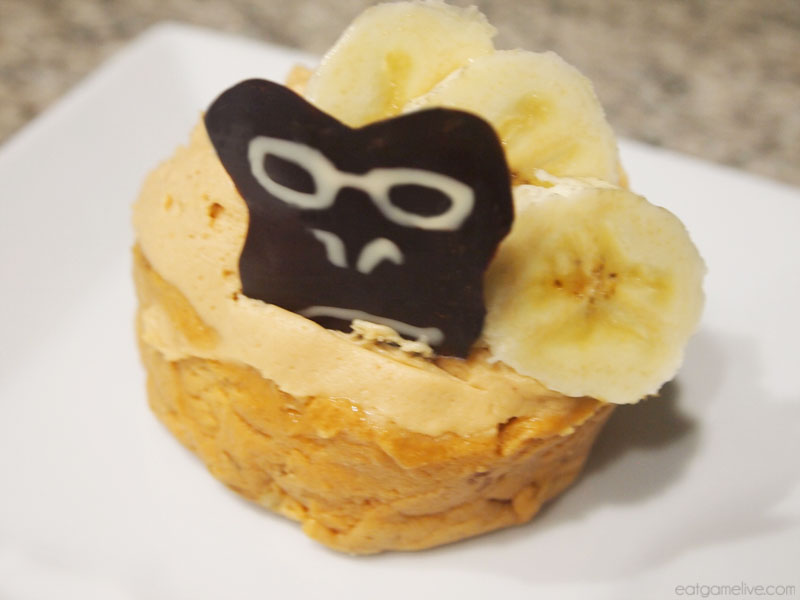
The decoration on top is purely optional, so the steps for the logo is listed separately.
*~*~*~*~*~*~*~*~*~*~*~*~*~*~*~*~*~*~*~*~*~*~*~*~*~*~*~*~*~*~*~*~*~*~*~*~*~*~*~*~*~*
Ingredients
Cake
- 3 4inch round cakes, cut to about ½ in height each
- For the purpose of this recipe we are omitting the details for the cake part. Just follow your favorite box mix recipe, brownie recipe, or use store-bought cake, anything works! The magic is in the mousse layers.
Honey Mousse
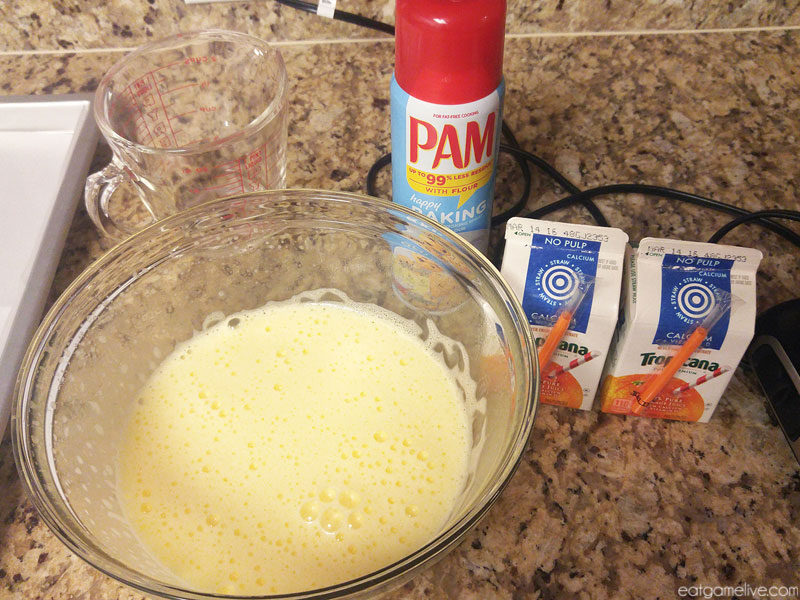
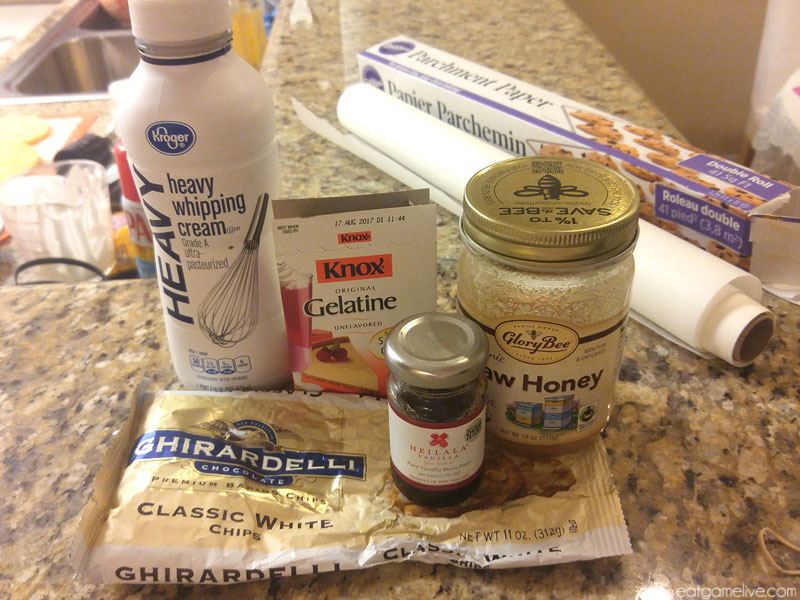
- 4.5 (a little over 1/2 cup) oz White Chocolate Chips + 1/4 Cup Heavy Cream
- 1/2 Cup Heavy Cream (or 1 cup of coolwhip for the lazy)
- Pinch Salt
- 2 tablespoon Honey
- 1 teaspoon Unvloared Powdered Gelatin (if you’re using the Knox package, it’s about 1/3 of one pouch)
- 1 tablespoon Water
- 1 teaspoon Vanilla Bean Paste or Extract
Chocolate Mousse
- 4.5 (a little over 1/2 cup) oz Semi-Sweet Chocolate Chips + 1/4 Cup Heavy Cream
- Pinch Salt
- 1/2 Cup Heavy Cream (or 1 cup of coolwhip for the lazy)
- 1 teaspoon Unvloared Powdered Gelatin (if you’re using the Knox package, it’s about 1/3 of one pouch)
- 1 tablespoon water
Tools
- 3 4inch spring loaded cake pans
- Parchment Paper – Cut long enough strips to line the sides of your pan/mold
- You can use a larger mold or pan and have a bigger cake.
- You can also forgo the cake and just put the mousse in any vessel of your choice, and enjoy it as a dessert after it sets!
*~*~*~*~*~*~*~*~*~*~*~*~*~*~*~*~*~*~*~*~*~*~*~*~*~*~*~*~*~*~*~*~*~*~*~*~*~*~*~*~*~*
Directions
- Cut stripes of parchment paper long enough to line the sides of your pan or mold and line the inside. We really recommend using a spring loaded pan with a removable bottom so it’s easier to slide the cake out when it’s done
- Put the round disk of cake on the bottom of the pan
- Make Honey Mousse
- Microwave the white chocolate chips + cream mixture at 50% power for 30 seconds. Take it out, stir evenly, and return to the microwave 15 seconds at a time to completely melt the mixture
- Whisk together the gelatin + water and set it aside for 5 minutes.
- Meanwhile, whip the remaining ½ cup of heavy cream with either a stand mixer or hand mixer to form stiff peaks. And for the lazy, sub this for 1 cup of CoolWhip.
- Microwave the gelatin mixture for 10 seconds to melt the mixture
- Combine the melted chocolate, vanilla, and gelatin mixture
- Mix in ⅓ of the whip cream into the chocolate mixture
- Fold the rest of the whip cream into the chocolate mix gently
- Distribute the mousse mixture evenly on top of the cakes in the pan and tap it on a hard surface to let out the air bubbles
- Set the cakes in the fridge for 25 mins to set before putting on the chocolate layer
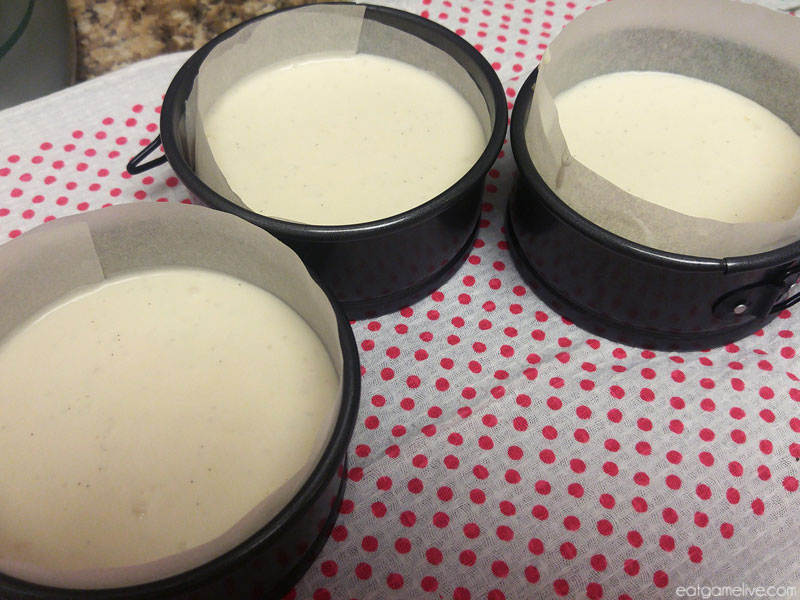
Layer of honey mouse setting – Use parchment strips to line the pan for easy removal
- Make Chocolate Mousse
- Same steps as the honey mousse before
- Microwave the semi sweet choco chips + cream mixture until melted
- Whisk together gelatin + water
- Make whip cream
- Microwave gelatin for 10 seconds to completely dissolve the mixture
- Combine the chocolate and gelatin
- Incorporate whip cream into the chocolate base
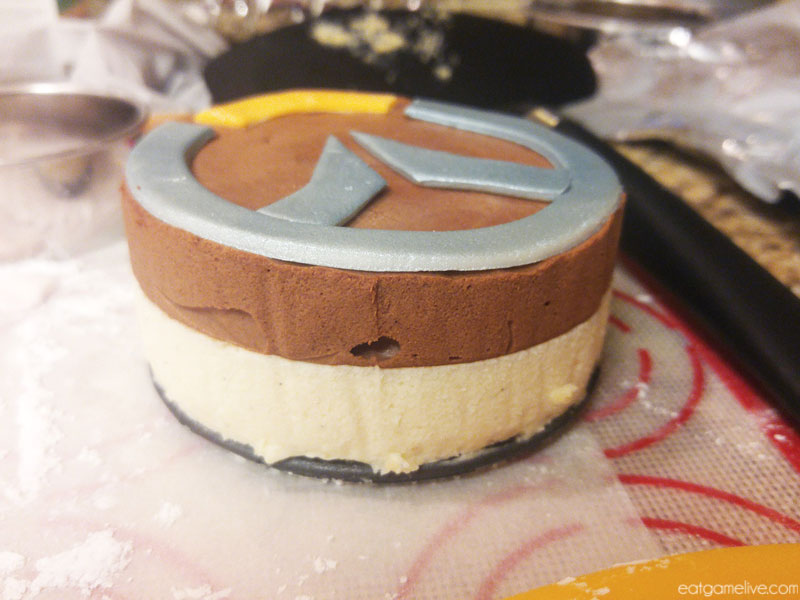
- Evenly distribute the chocolate mixture on top of the now set honey layer
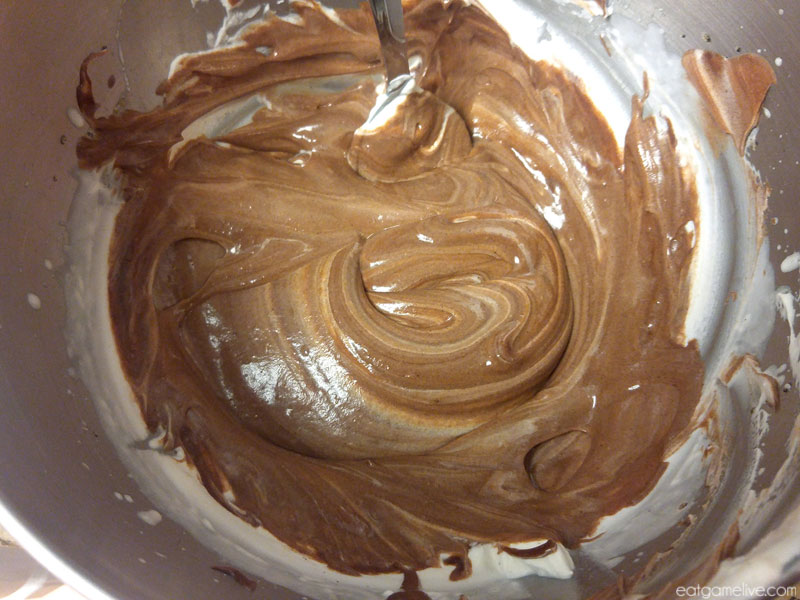
Folding in whipped cream into chocolate!
- Refrigerate the entire cake for at least 4 hours or until set
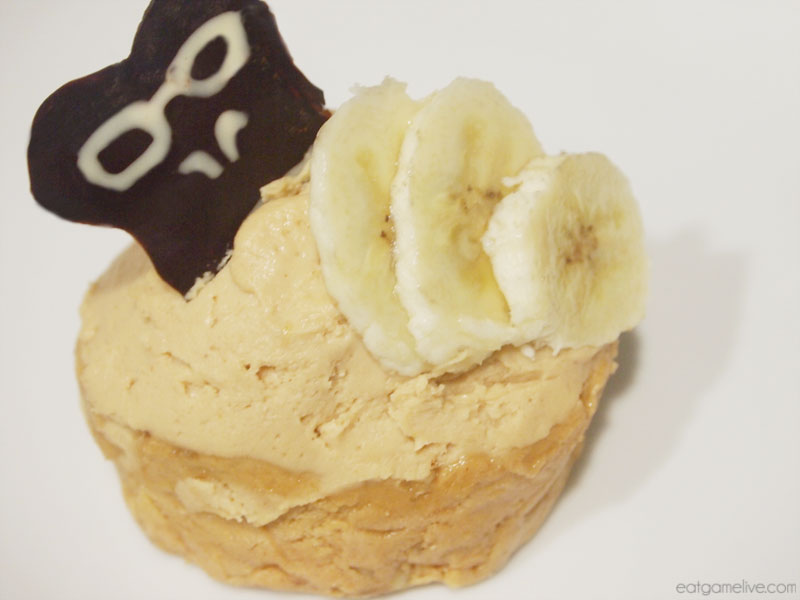
- After the mousse is completely set, pop the cakes out of the pan and decorate it to your heart’s desire!
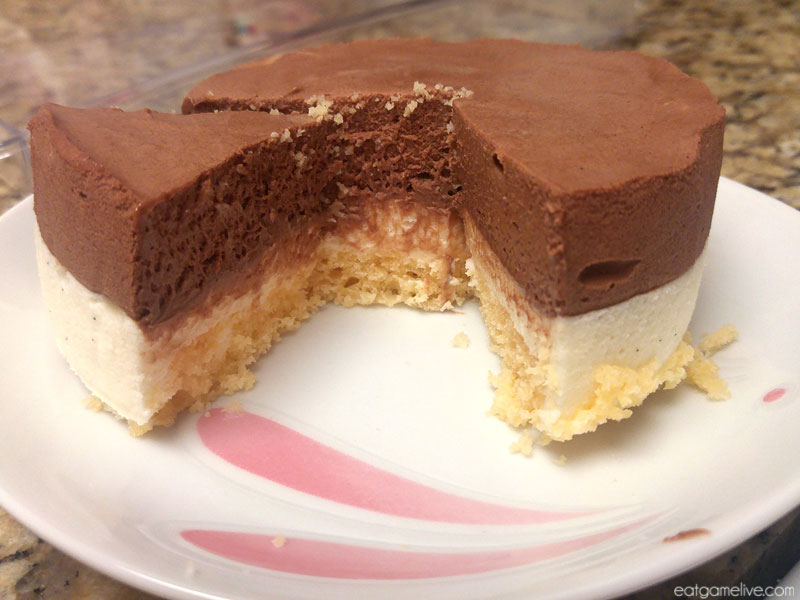
So airy, so light, cut side view!
*~*~*~*~*~*~*~*~*~*~*~*~*~*~*~*~*~*~*~*~*~*~*~*~*~*~*~*~*~*~*~*~*~*~*~*~*~*~*~*~*~*
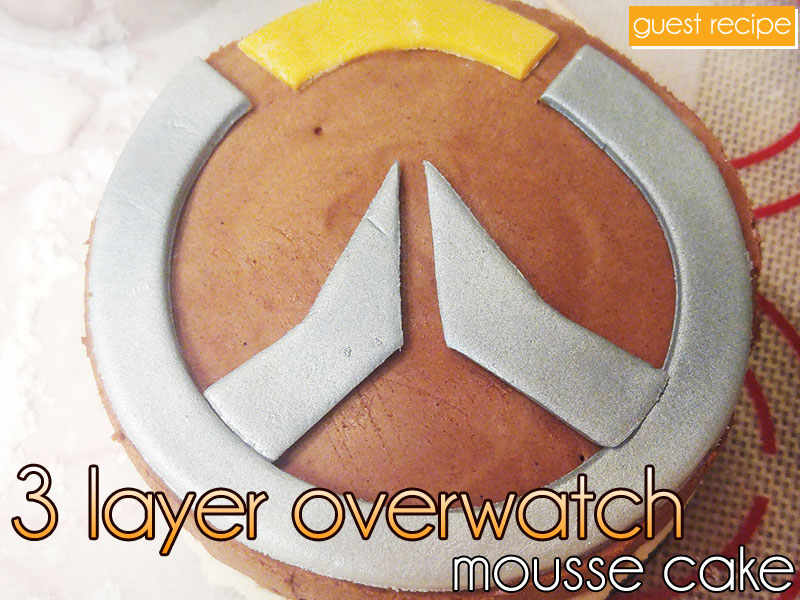
Optional Overwatch Logo Decoration
- Fondant – for decoration
- 2 Drops – Orange Food Coloring (mix red & yellow)
- Silver Food Decorating Graffiti
- Round cookie cutters – 4inch and one slightly smaller to create the inner ring of the Overwatch logo
Directions
- Knead the fondant until soft & pliable – roll it out to an ⅛ thick sheet
- Use the round 4 inch cutter to cut out a circle
- Use the slightly smaller cutter (I used a 3 ½) to cut out the middle of the 4 inch circle, leaving you with a ring shape

Use 2 round cutters to make the ring - Use a knife to trim out the top orange part of the logo and the angled pieces in the middle. Print out a picture of the logo as a guide if you want it to be more perfect, or have the logo handy as a reference
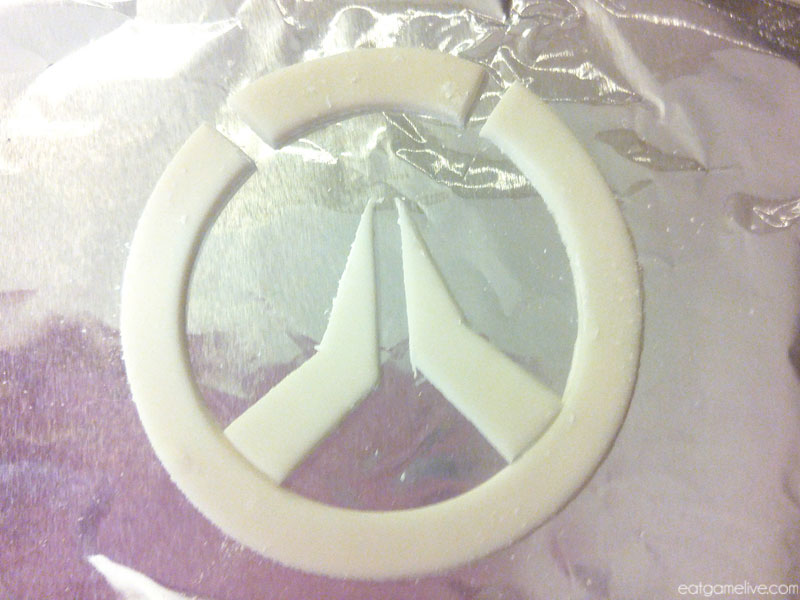
Cut out shapes using a knife. Use a print out as guide if you need! - Lay the bottom parts of the logo on foil or parchment, and spray paint it with the silver spray – set aside till dry

If you can find the spray – you can make it silver! - Re-roll the rest of your fondant and color it with the orange food coloring
- Roll the orange fondant just like before and cut out the top part
- Let the fondant sit out for a bit till it dries, then top your amazing cake with it!
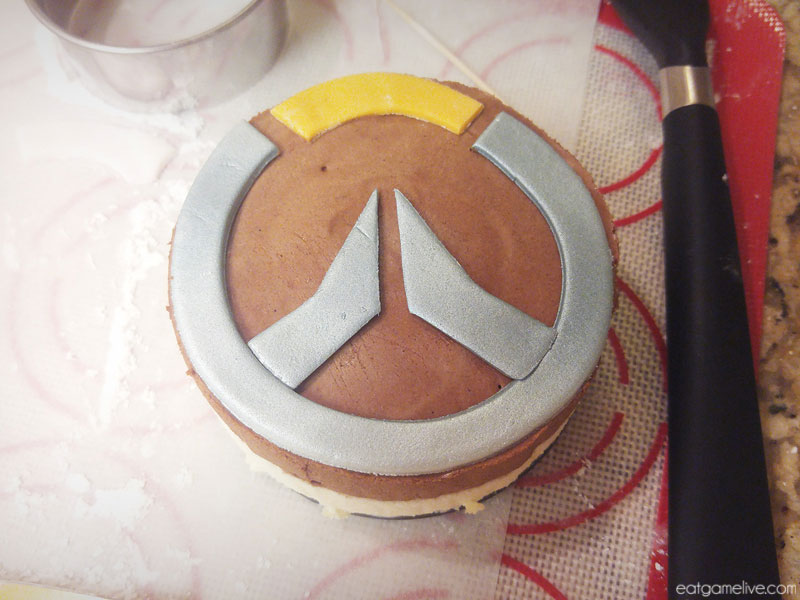
Ta-daaaa!  You know, the world could always use more heroes!
————————————————————————————————
This was a special guest recipe by Meru. She’s an amazing baker, a spectacular chef and a ferocious Brightwing! You can follow her delicious adventures here on Twitter.