When I started playing StarCraft II: Wings of Liberty, I always feared the infamous Zerg baneling bust. I would religiously scout at 10 supply so I could catch the Zerg’s fast gas. The moment I saw that, I went into full barricade mode… PULL SCVS OFF GAS! BUILD MORE BARRACKS! THIS IS NOT A DRILL!
I remember I held off a pretty fierce baneling bust and my opponent said, “Wow, you’re one of the first to hold that. GG”. Dang, that felt SO good! Getting a compliment from a complete stranger in a video game always boosts my ego.
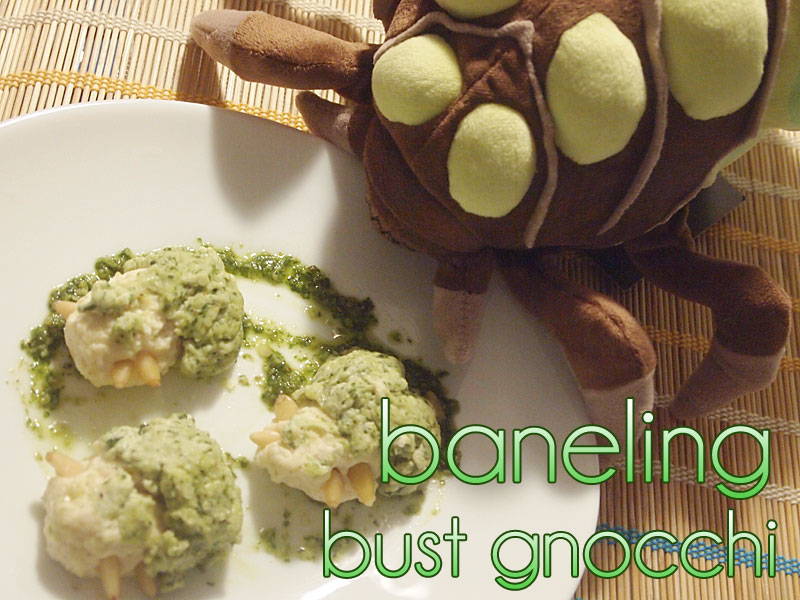
However, most games did not go so smoothly back then. I’d get caught off guard and BOOM, my supply depots would just explode and my entire base would be covered in baneling pesto! Err, I mean baneling acid guts. I suppose the baneling’s acid looks suspiciously similar to basil pesto, right?
UNIT COMPOSITION
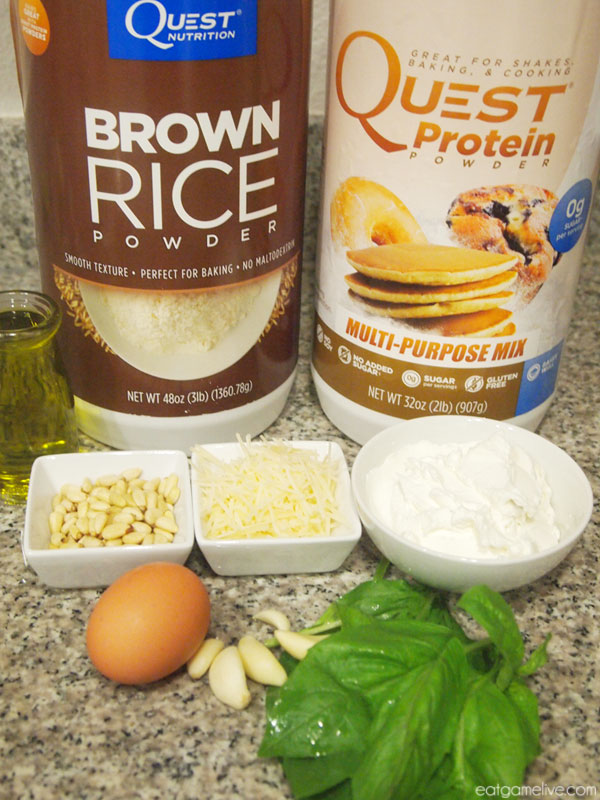
FOR THE GNOCCHI
- salt
- 1/4 teaspoon of nutmeg
- 1 egg
- 1 cup of ricotta cheese
- 1 scoop of Quest Brown Rice Powder
- 2 scoops of Quest Multi-Purpose Mix Protein Powder
FOR THE BASIL PESTO
- salt
- pepper
- 3 – 5 cloves of garlic
- 1 tablespoon of pine nuts (reserve some for later)
- 2 tablespoons of parmesan cheese
- 2 tablespoons of olive oil*
- 1/2 cup of basil
(you may end up with extra pesto!)
*you may need to add more to get a smoother consistency
BUILD ORDER
Adapted from The Splendid Table
This recipe takes about 20 minutes to prep. Cook time is <5 minutes. This makes about 3 servings.
Each serving contains: ~36g of Protein, ~26g of Fat, ~12g of Net Carbs
OPENING
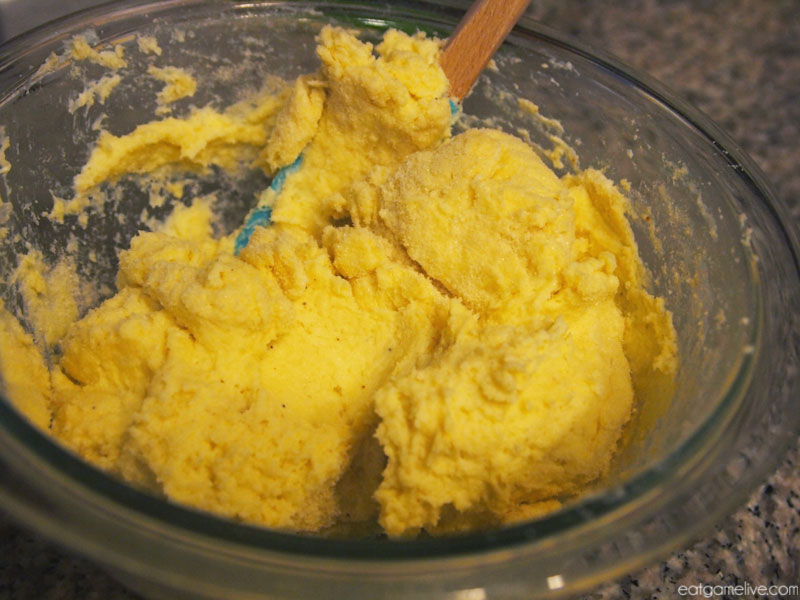
- In a bowl, combine your ricotta cheese with your egg. Stir until thoroughly mixed.
- Sprinkle in 3/4 of a scoop of brown rice powder. Stir until combined.
- Add in your two scoops of protein powder, salt, and nutmeg. Mix until you get a doughy consistency.
MID GAME
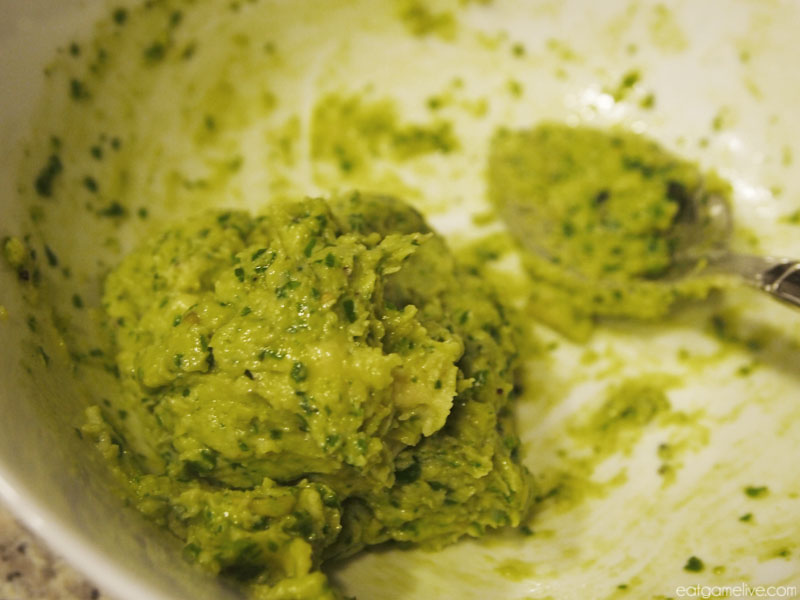
- In a food processor, combine 1 tablespoon of olive oil, basil, pine nuts, garlic and parmesan cheese.
- Remove about 2 tablespoons of the mixture and set aside.
- Continue adding your remaining tablespoon of oil or until you’re happy with the consistency of your pesto.
LATE GAME
- Coat a clean surface with 1/4 a scoop of brown rice powder.
- Knead your dough into a ball.
- Cut this ball in half. Add 1/2 to a bowl and mix pesto into it to create the baneling’s acid sacs.
- With the other half, cut it into 4 equal sections and roll them into long noodles.Then, cut these noodles into smaller 1″ portions. You should get about ~12 of them.
- Then, take your pesto-infused dough and create small spheres for each of the gnocchi. This dough will be much more difficult to handle due to the pesto’s oil. Attach each sphere to the gnocchi. You can also add eyes to the baneling by carefully placing some extra green gnocchi dough on its face.
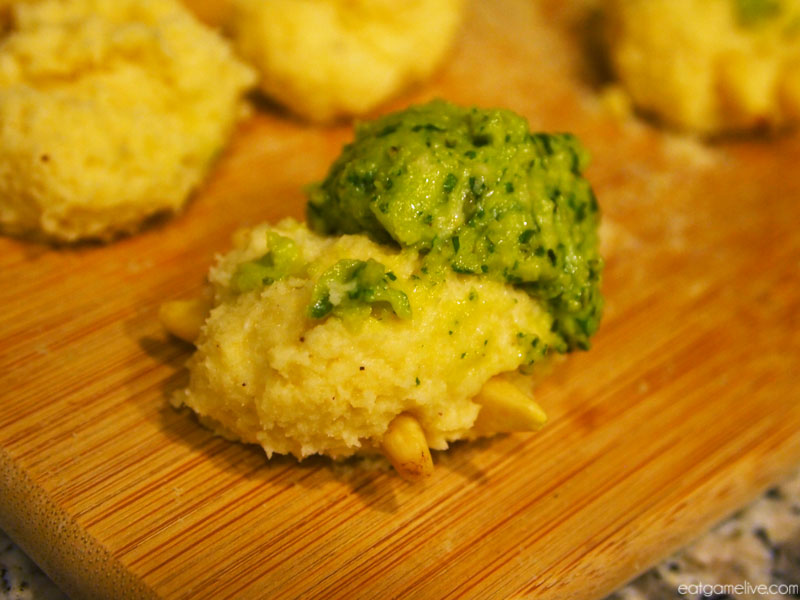
- Take 4 pine nuts and place them into the sides of the gnocchi.These will become the baneling’s feet.
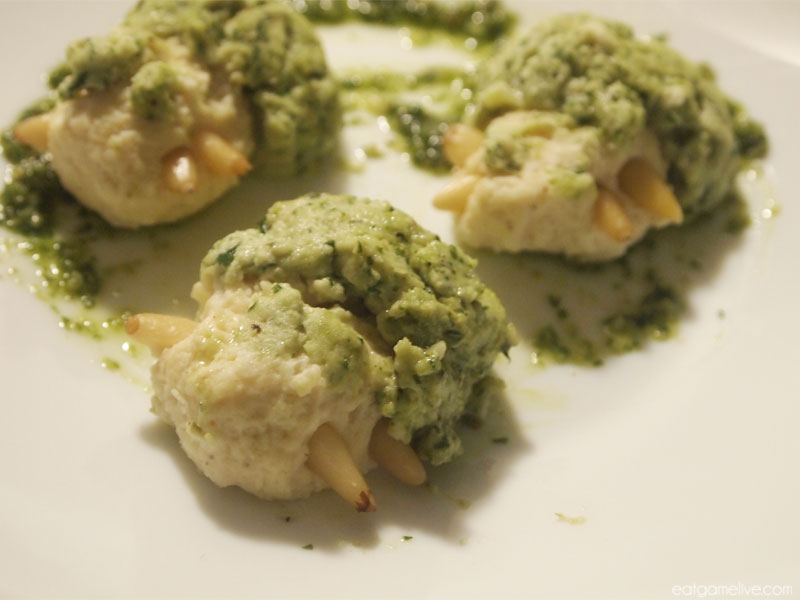
- Boil your water and season with salt. Carefully drop each gnocchi into the boiling water. The gnocchi will float to the surface when they’re almost ready (should take about ~2 minutes). I recommend cooking them in separate batches so they don’t stick to one another. Remove the gnocchi using a slotted spoon.
- Plate your gnocchi and serve with your pesto.
- Eat!
GG WP!
Mine came out a bit more squished than I wanted (I crowded the pot too much!) … but they were still pillowy soft and protein packed! 
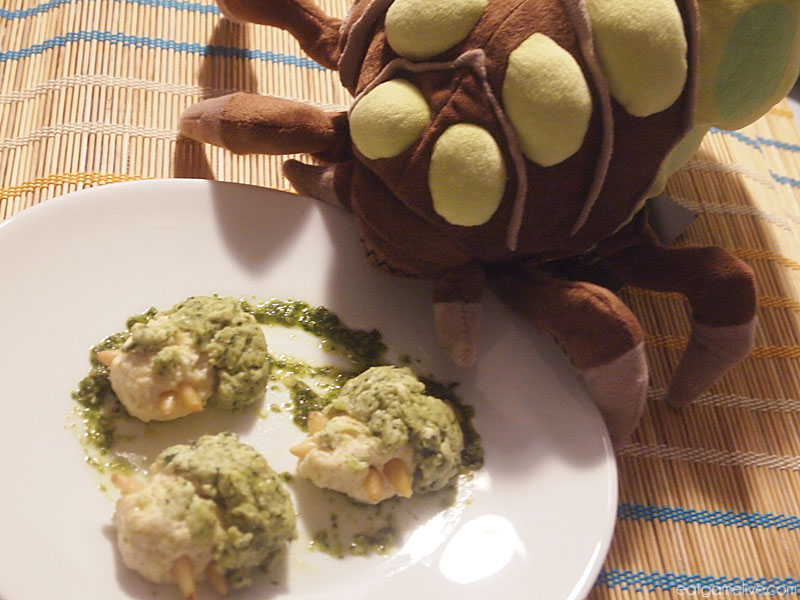
If you enjoyed this recipe, please check out another one of my Zerg-friendly Quest recipes: Spawning Pools!
—————————————————————————————————————
This recipe was created with support from Quest Gaming. Follow them on Facebook, Instagram and Twitter to learn more about how other gamers eat healthy and #CheatClean.