
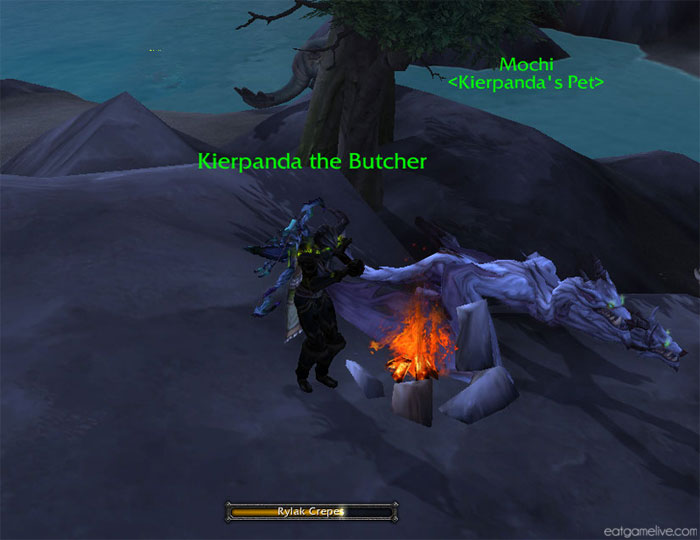
We’re headed back to Draenor for another delicious treat! This time, we’re looking to the skies for our meal… It’s RYLAK CREPES!
As a Hunter, it’s always awkward to create a dish from a beast that could have easily been one of your own companions.

LOOK AWAY, MOCHI! JUST… LOOK AWAY.
However, I’ve gotta eat somehow… You can’t fight the Iron Horde when your stomach is rumbling. Besides, those Rylak crepes do look mighty tasty.
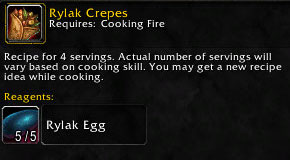
In Draenor, Rylak crepes only require five Rylak eggs. Unfortunately, since I couldn’t find any Rylak eggs where I live, I had to improvise with a few more ingredients.
 Rylaks are predators, so I would assume that any dish made from them would be packed full of lean protein. My version of Rylak crepes features chicken breast and Quest protein!
UNIT COMPOSITION
FOR THE CREPE
- salt
- 2 tablespoons of olive oil
- 1/2 cup of whole wheat flour
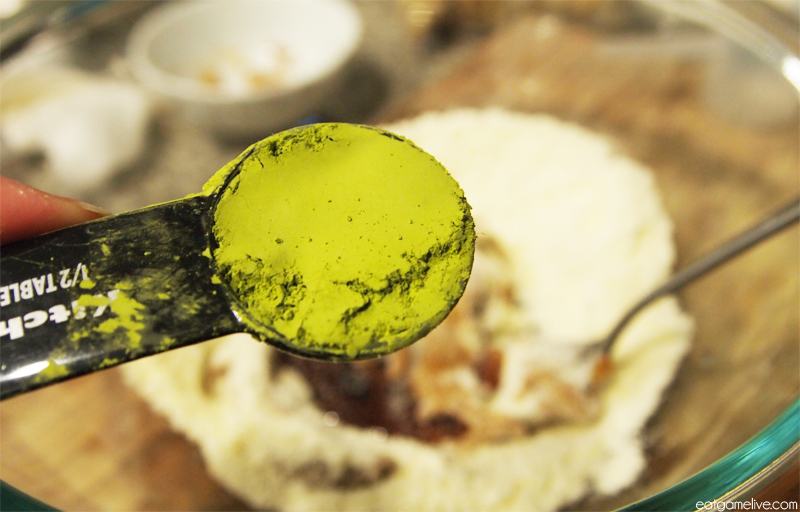
- 1 scoop of Quest protein powder
- 2 eggs
- 1 cup of milk
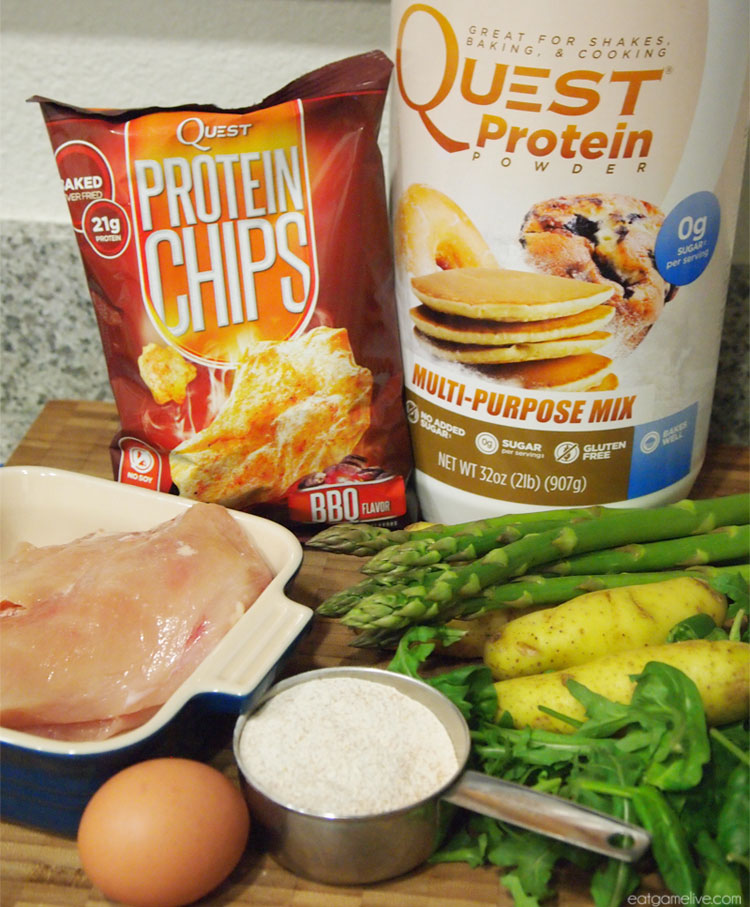
FOR THE FILLING
- salt
- pepper
- 3 tablespoons of olive oil
- 1 egg
- 1/2 cup of whole wheat powder
- 1/2 scoop of Quest protein powder
- 2 bags of Quest BBQ protein chips
- 1 lb of chicken breast, cut into strips
- 1/2 cup of arugula or baby spinach, washed
- 1/3 lb of asparagus
- 2/3 lb of fingerling potatoes, cut into fries
FOR THE SAUCE (optional)
- 1 tablespoon of honey
- 2 tablespoon of mayonnaise
- 2 tablespoon of mustard
BUILD ORDER
Total prep time for this dish is about 45 minutes. Total cook time is about 35 minutes. This will make about 4 servings. Each serving contains about ~57g of protein.
OPENING
- Preheat your oven to 350°.
- Open your bag of chips to let out the air. Then, crush the chips in the bag to create the crispy coating for your chicken.
- Place your sliced chicken, 1/2 cup of whole wheat flour, mixed egg and crushed chips into separate dishes. This will be your dredging station.
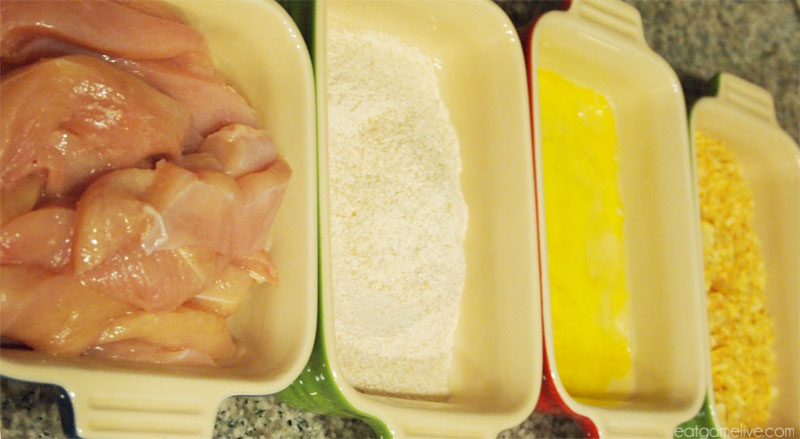
- Add in 1/2 scoop of protein powder to your whole wheat flour and mix to combine.
- Take your chicken breast and dip it in the whole wheat flour. Then, dip it in the egg. Then, lightly coat it with the crushed chips. You will want to different hands for this to avoid getting the flour and egg mixture stuck to your hand (something that Alton Brown refers to as “club hand”).
For example, use your left hand for the flour to egg portion. Then, use your right hand for the egg to chips portion. - Place the coated chicken strips on baking sheet lined with aluminum foil.
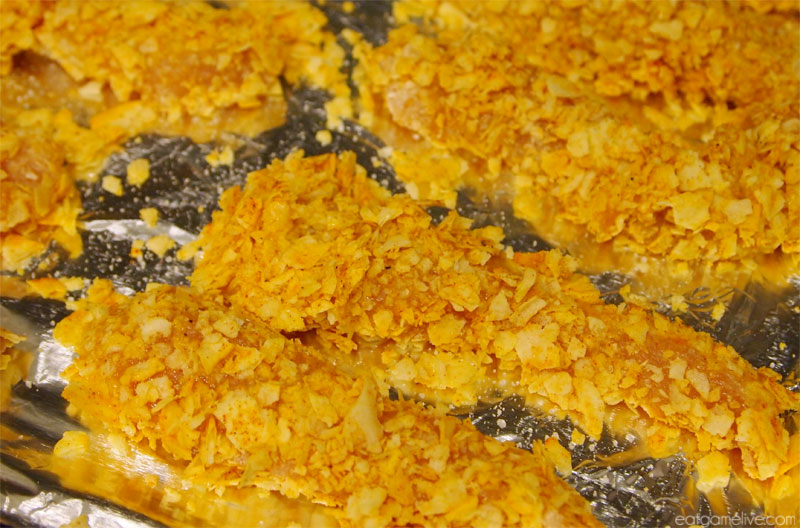
- Lightly drizzle 1 table spoon of olive oil over the chicken strips.
- Bake them for about 14 minutes. While your chicken is baking, prepare the rest of the filling.
MID GAME
- In a medium sized pan, add in 2 tablespoons of olive oil. Set it on medium high heat.
- Once your olive oil comes up to temperature, place your sliced potatoes in the pan.
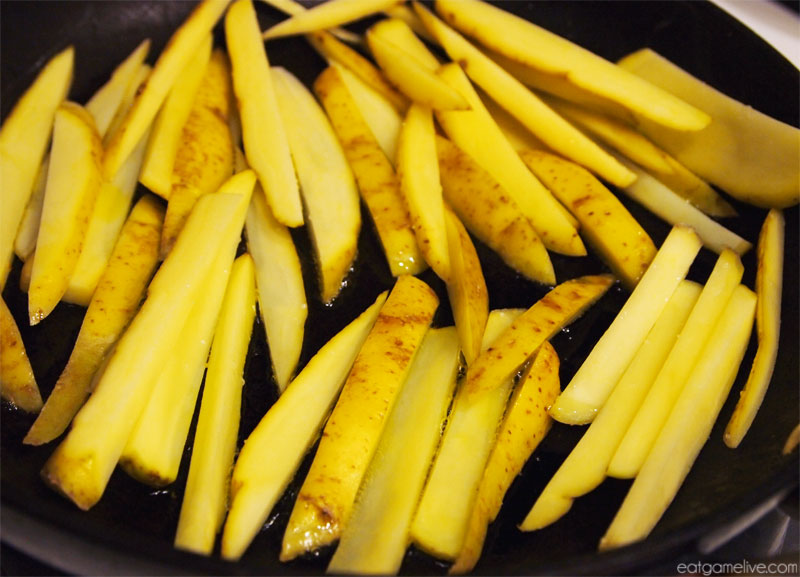
- Let them cook for about 2 -3 minutes on each side or until browned.
- Once they’re crispy, remove them from the oil and let them dry on over a paper towel. This paper towel will be used to absorb any extra oil.
- Steam your asparagus or boil (you can cheat by throwing them in the microwave for about 2 minutes in a dish with water!).
- Carefully wipe your skillet with a paper towel. You will be using this same skillet to make your crepes.
LATE GAME
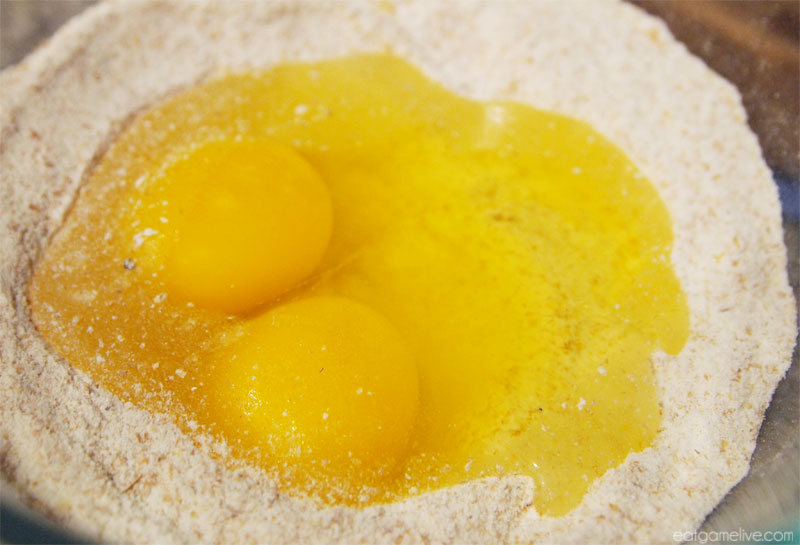
- In a bowl, whisk together 2 eggs, 1/2 cup of whole wheat flour, 1 scoop of protein powder and 1 cup of milk. Add in salt for seasoning.
- Set your pan to medium heat.
- Pour 2 tablespoons of olive oil into a small bowl. Dip a paper towel into the olive oil and use it to coat the pan with olive oil. You will be doing this between each crepe.
- Use a ladle or measuring cup to add your crepe batter to the pan. Quickly swirl the pan to ensure that the batter evenly coats the surface of the pan.
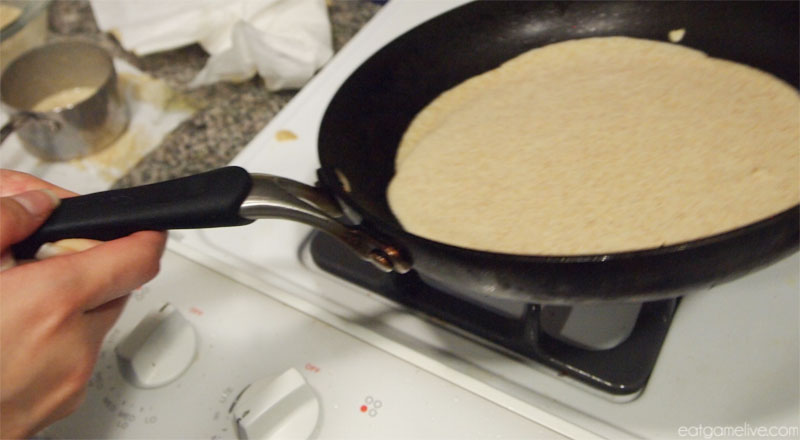
- Allow the crepe to cook for about 1 1/2 minutes. Then, flip it over.

- Continue cooking for another minute and a half. Remove the crepe and repeat the process. Be sure to wipe down the pan with olive oil.

- Once you’ve finished making all your crepes, it’s now time to assemble them. Place a fresh crepe on a plate.
- Place your asparagus, spinach/arugula, chicken, and potatoes in the center of the crepe.
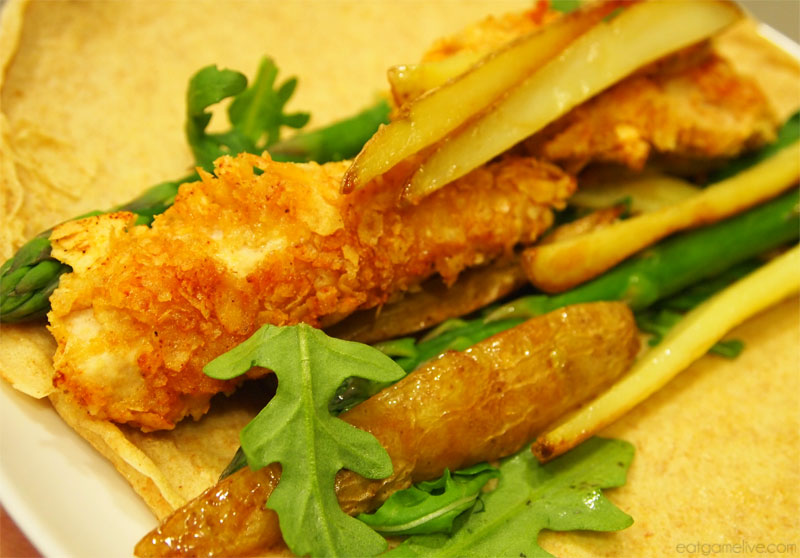
- Then, roll the crepe up and use a toothpick to hold the crepe in place. ‘
- OPTIONAL: Create a honey mustard dipping sauce by combining mayonnaise, honey and mustard.
- Eat!

GG WP!

As you can see, I had a lot of fun making this recipe. Hopefully you’ll have as much fun as I did! 

Happy travels, adventurer!
——————————————————————————————————————————–
This recipe was created with support from Quest Gaming. Follow them on Facebook, Instagram and Twitter to learn more about how other gamers eat healthy and #CheatClean.

 OH HEY GUYS WHATCHA DOIN??

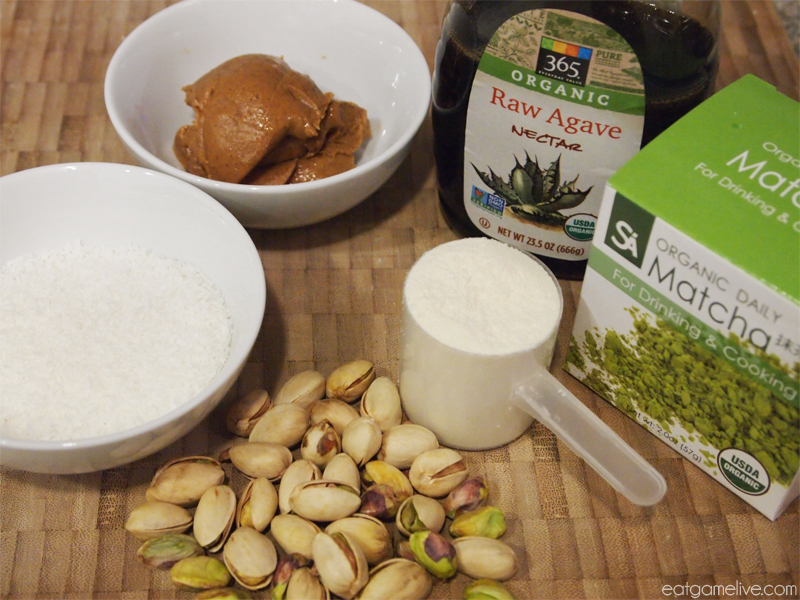
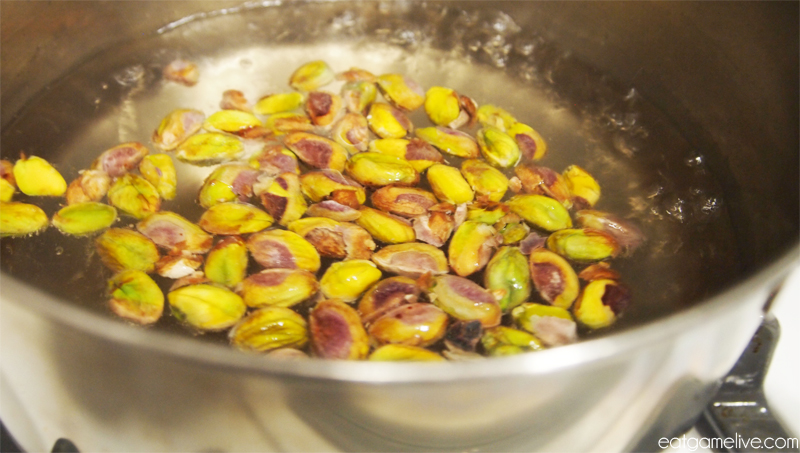 Then remove the pistachios from the hot water and place them in a bath of ice water. Once they are cool to the touch, gently rub off the skins from the pistachios. Let them dry on a towel for a few minutes.